Apple Crisp
An apple crisp is hands down the perfect dessert to make year round. Whether it’s the end to a perfect holiday dinner or to celebrate the Fourth of July, this dessert is our family’s go-to choice. In fact, one of my favorite things about this recipe is how fool-proof and reliable it is, making it perfect for any holiday celebration. For all of these reasons and more, we’ve put together the keys to creating the best apple crisp below.
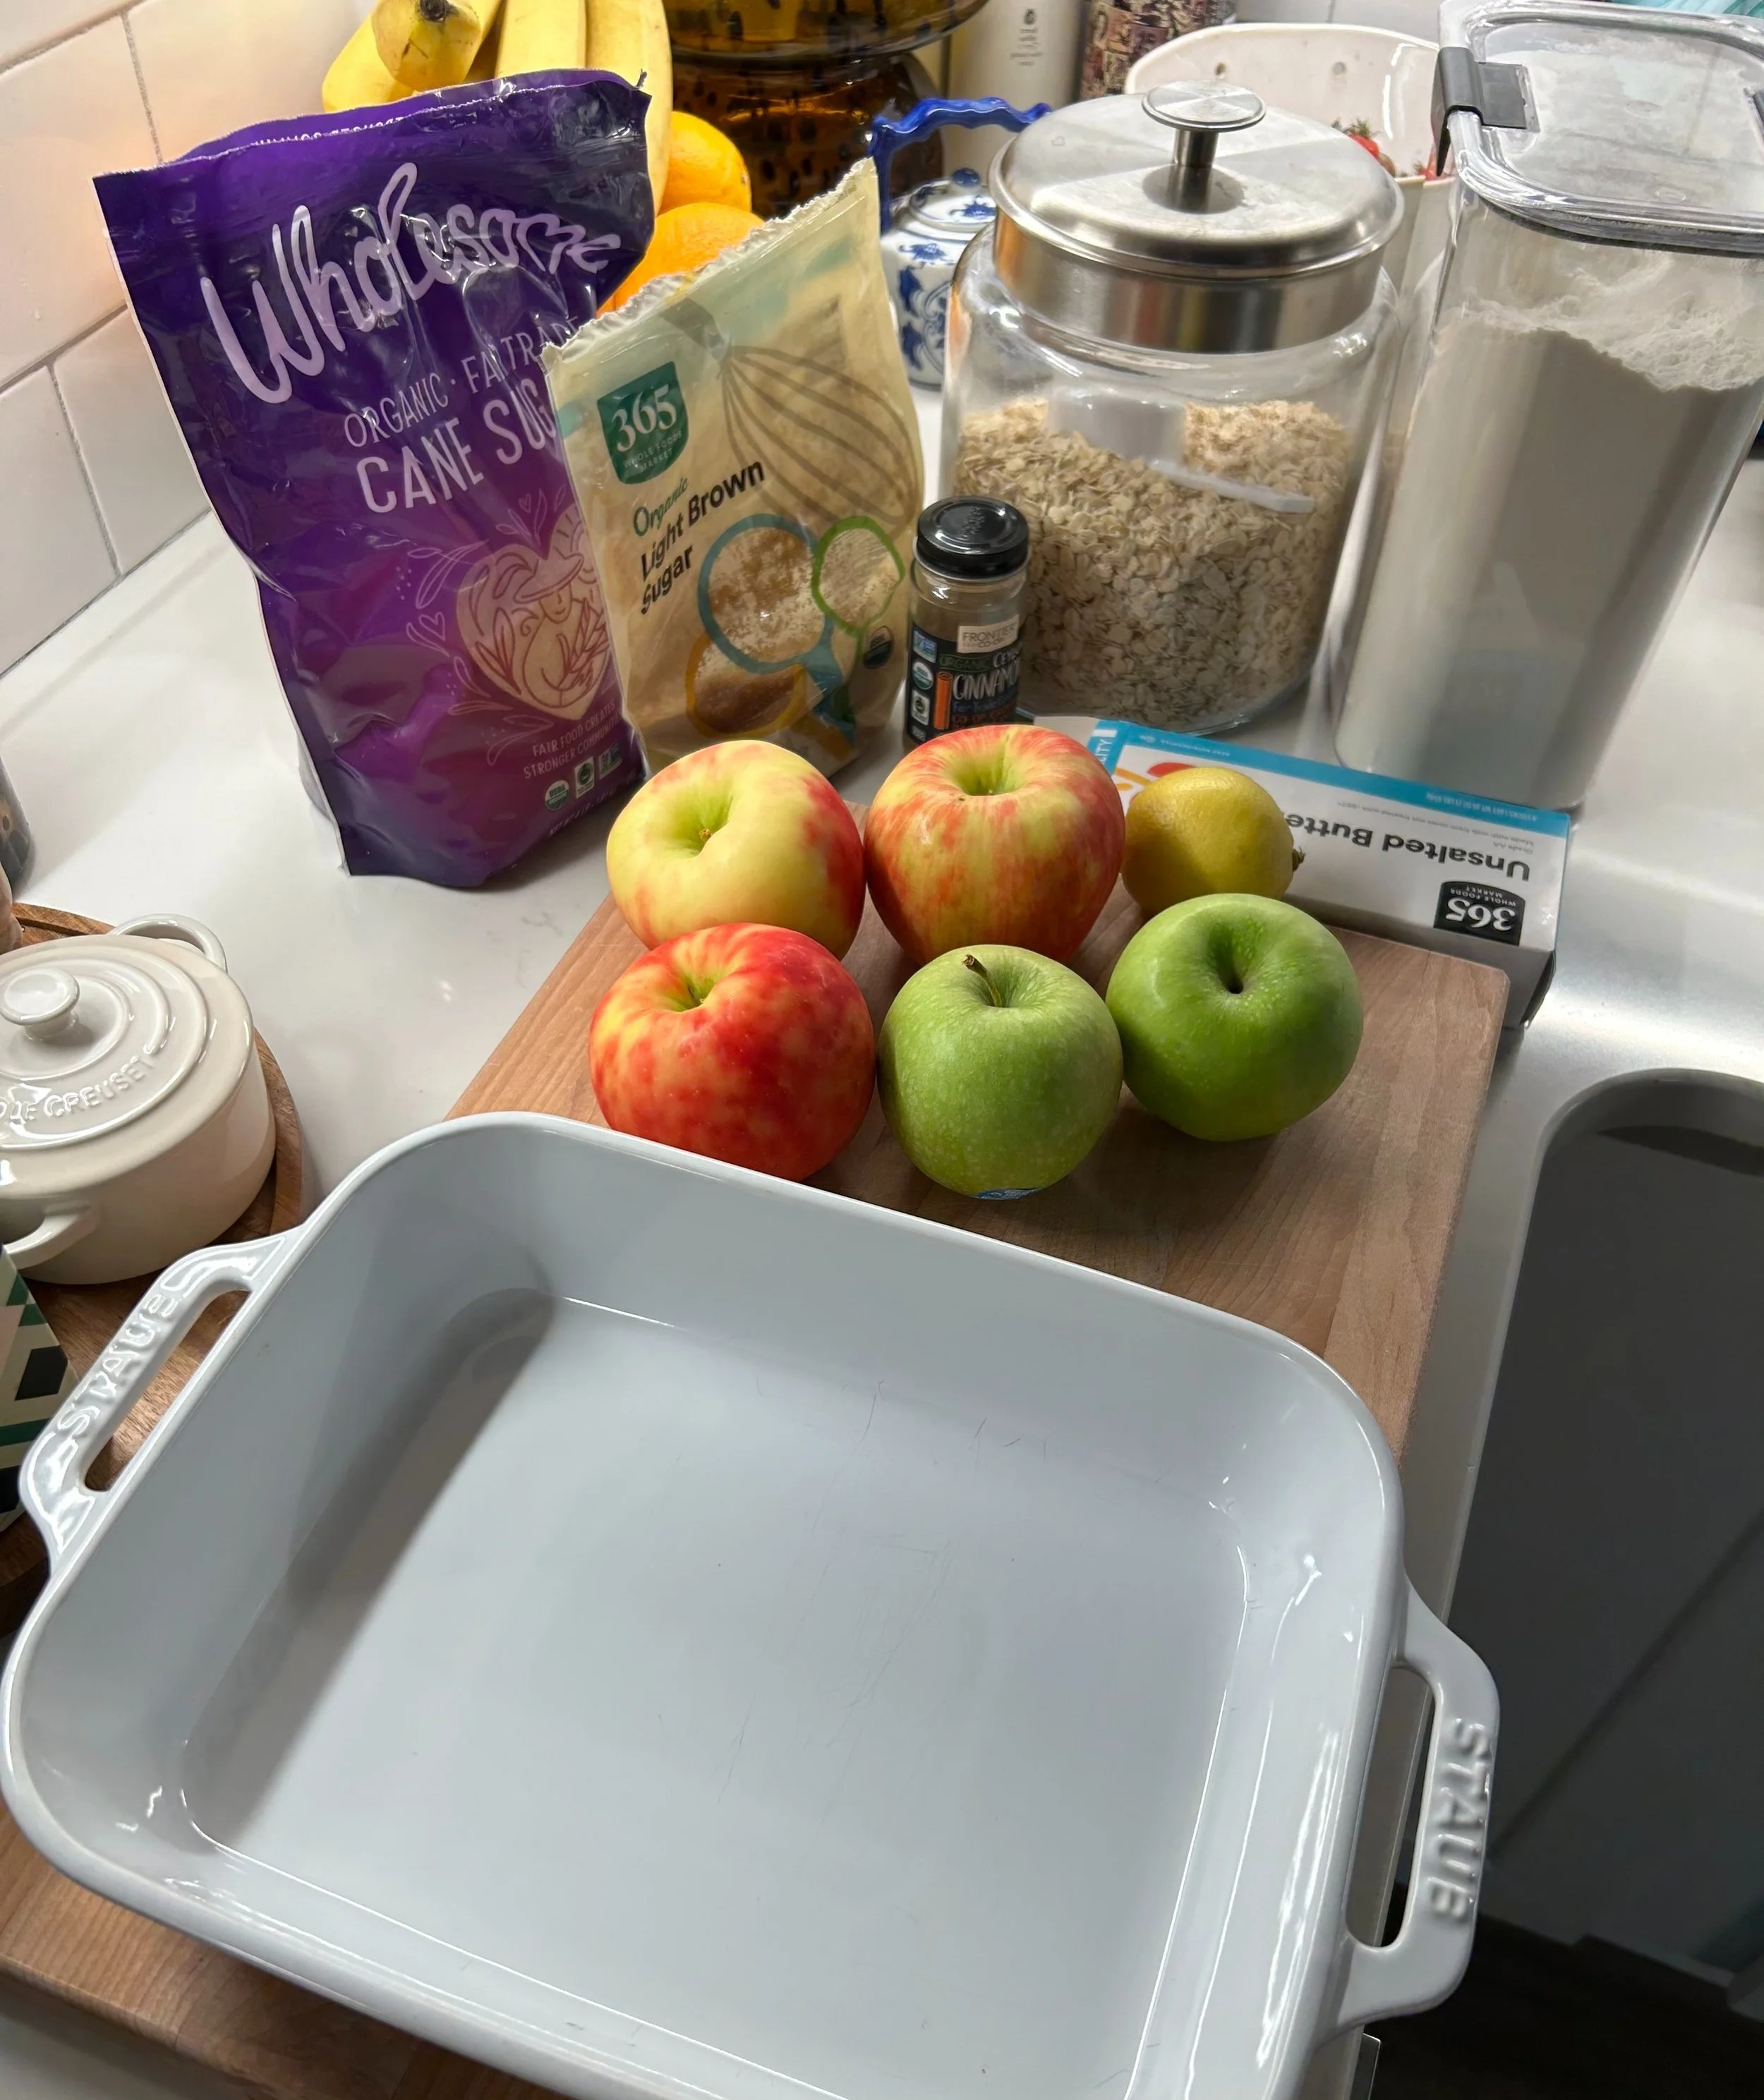
What are the best apples for an apple crisp? Thankfully there is a lot of versatility in what apples you can use to create a successful apple crisp. My favorites are honeycrisp and granny smith used in combination to achieve a nice depth of flavor since granny smiths are tart and honeycrisps lean more sweet. With that being said, you can use any combination of apples you like, for example fuji or pink lady. The trick here is to choose an apple that is very crisp and firm, avoiding any apples that can become mealy such as gala or red delicious.
How long does it take to bake an apple crisp? As with all recipes, how long you bake an apple crisp ultimately depends on how hot your oven actually is. You can use an oven thermometer to ensure that your oven is at the proper temp, but typically, this dish will take around 45 minutes to cook at 350 degrees.
Do you cover apple crisps when baking? I recommend leaving the apple crisp uncovered for the majority of the baking, only covering with tin foil if the topping starts to brown too quickly. You can also take the opposite approach and leave the crisp covered until the last few minutes of baking, giving the crumble time to brown on top. Either method will give you a great result!
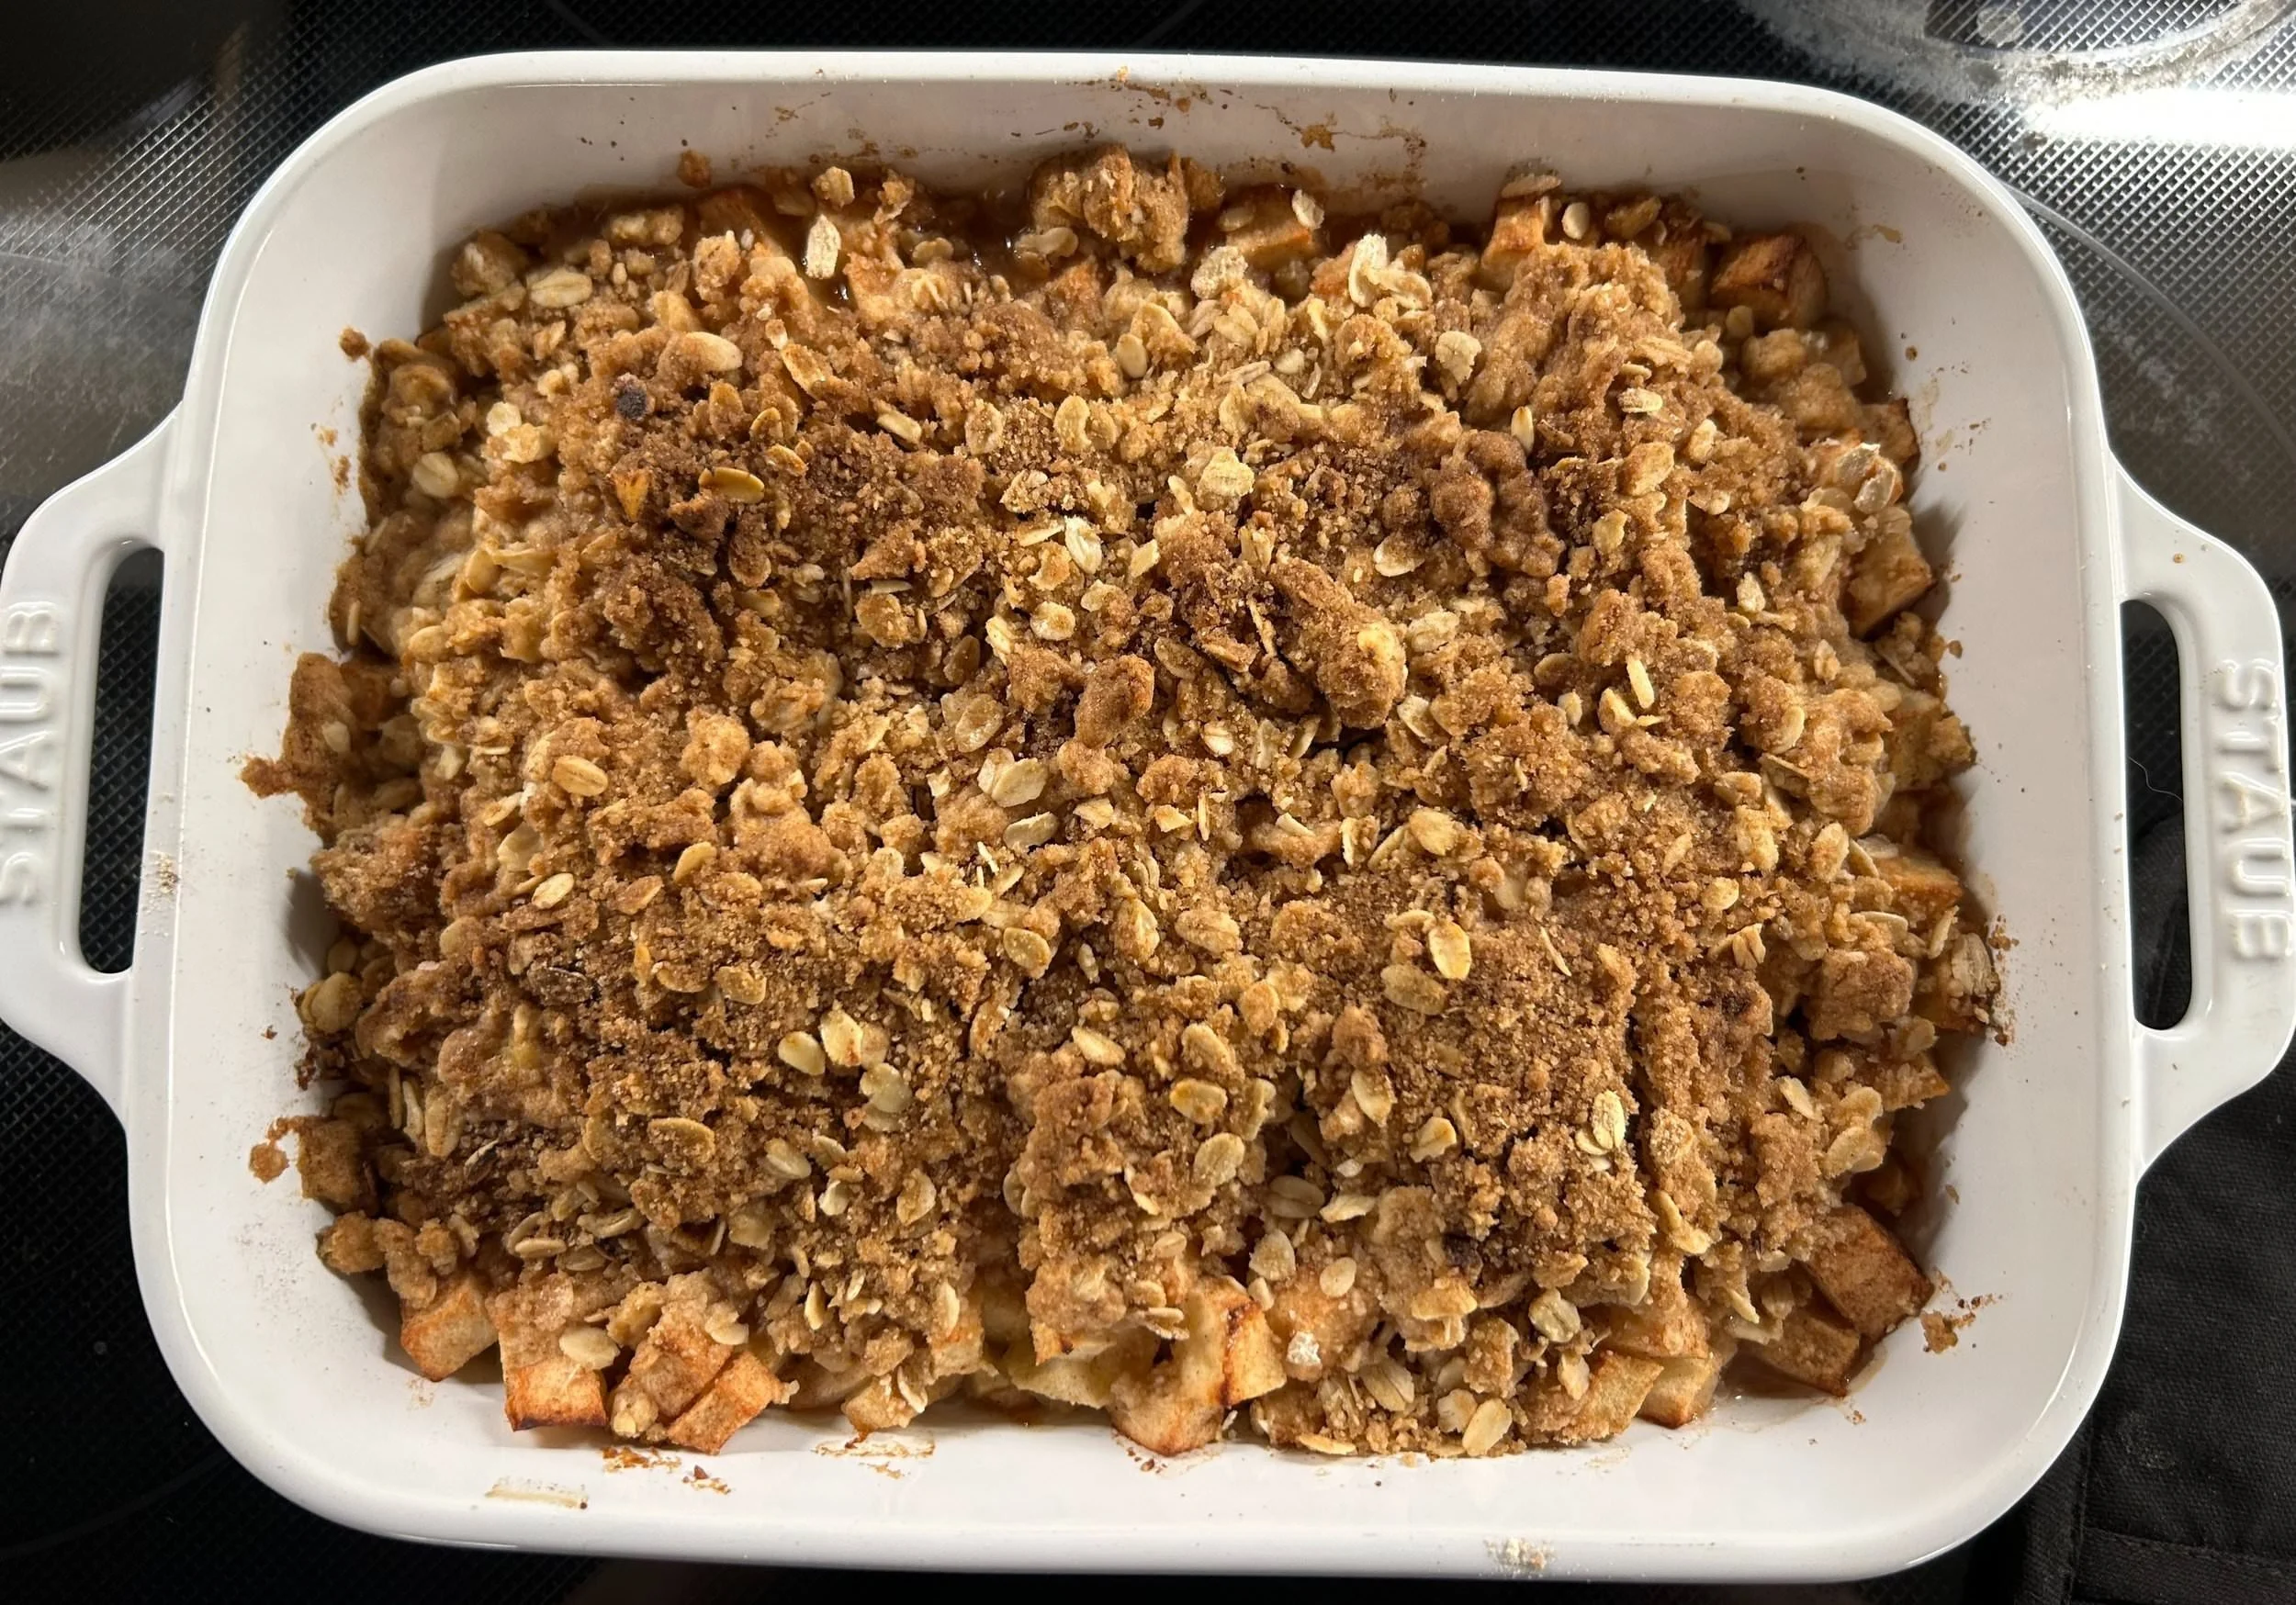
How to know when an apple crisp is done? The best indicators to distinguish if an apple crisp is done or not is:
If the entirety of the crisp is bubbling (even in the center)
The topping is browned and crispy
The apples are soft and able to be punctured easily with a knife with no resistance
How to store an apple crisp? The best way to store an apple crisp is by covering the entire baking dish (once cooked and completely cooled) with plastic wrap and putting it into the fridge. Wrapping the dish tightly will ensure that the crisp will last for a few days in the fridge, I recommend enjoying it for up to 5 days. On the other hand, if you want to prepare this dish in advance you can complete all of the steps up until putting it in the oven, wrap the cold, uncooked crisp in plastic wrap, and cook a few days later. My only recommendation here would be to let the crisp rest on the counter when removing it from the fridge so that it can lose some of its chill before it goes in the oven.
Happy baking!

Apple Crisp
Ingredients
- 5 apples - preferably 3 honeycrisp and 2 granny smith
- 1 tbsp cane sugar
- 1 tsp cinnamon
- 2 tbsp lemon juice
- Pinch of salt
- ¾ cup of brown sugar
- ¾ cup of Oats
- ¾ cup of Flour
- ½ cup butter
- Pinch of salt
- 1 tsp cinnamon
Instructions
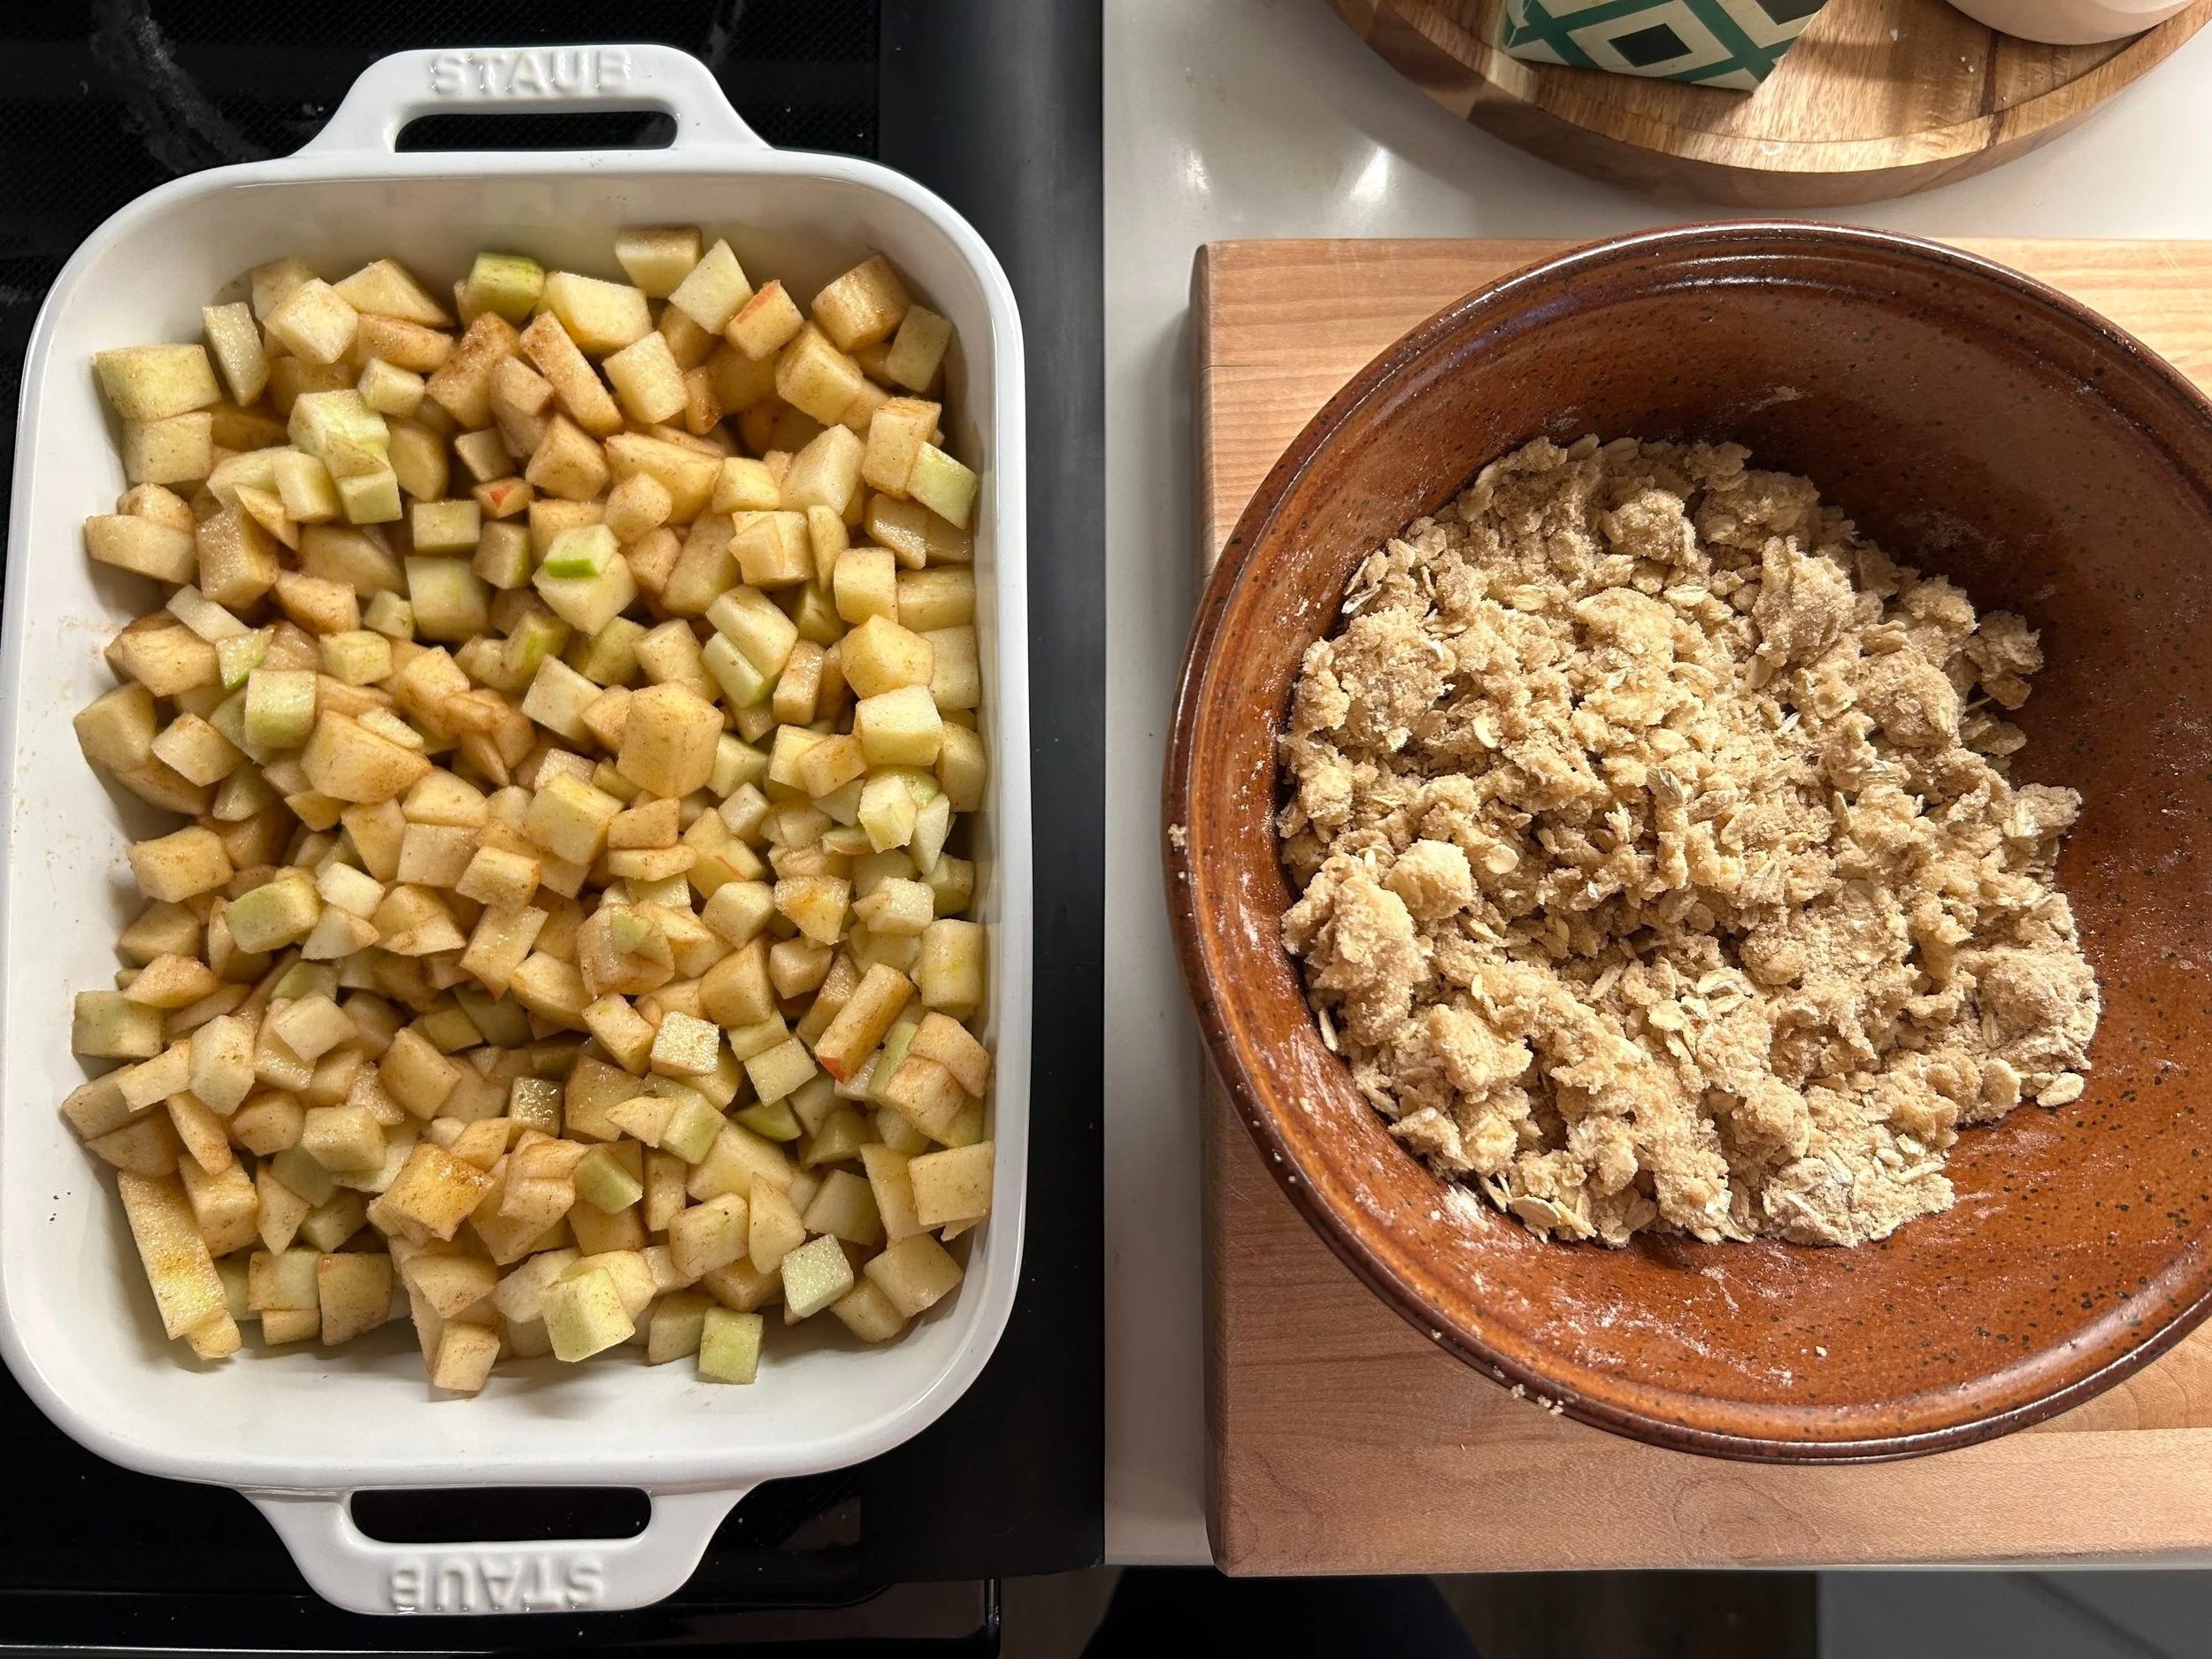
- Preheat your oven to 350 degrees. Prepare your apple crisp by cutting all of the apples in roughly ½ inch cubes.
- Once all of the apples are cut, toss them in a medium-sized bowl with the cane sugar, cinnamon, lemon juice, and salt.
- Butter an 8x10 baking dish or spray with cooking spray to avoid the crisp sticking and evenly distribute your apples in the dish.
- For the crumble, measure your sugar, flour, oats, salt, and cinnamon into a small bowl, mix until well incorporated.
- Cut the butter into small cubes (roughly ¼ inch, but the smaller you can get them the better) and use your hands to incorporate the butter into the flour mixture. When doing this, think of the process required to make biscuits — you want to be pushing the flour into the butter until you have a relatively homogenized mixture.
- Top the apple mixture with your crumble topping and bake for roughly 45 minutes, until the apples are tender and the crumble is nicely browned.


